
Part 1. Introduction: Don’t Panic, Your File is Probably Still There
Discovering that important files have been deleted from your Mac can trigger immediate panic, especially when those files contain irreplaceable memories, critical work documents, or important project data. However, understanding what actually happens when you delete a file can provide immediate relief and guide your recovery strategy. When you delete a file on Mac, the system doesn’t immediately erase the actual data from your storage device. Instead, macOS simply marks that storage space as available for new data while the original file content remains physically intact on the drive.
This fundamental principle means that recover deleted files mac operations are often successful, provided you act quickly and follow proper procedures. The critical first step in any recovery attempt is to stop using the affected drive immediately to prevent overwriting, which could make your deleted files permanently unrecoverable.
Part 2. The Quick Fixes (Before Using Software)
Before turning to specialized Mac data recovery software, several built-in Mac features might restore your deleted files:
1. Check the Trash Bin
- Click the Trash icon in your Dock
- Browse through the contents to locate your deleted files
- Right-click on the file and select “Put Back”
- The file will return to its original location automatically
2. Time Machine Backup Recovery
- Connect your Time Machine backup drive to your Mac
- Navigate to the folder where your deleted files were originally stored
- Click the Time Machine icon in the menu bar
- Select “Enter Time Machine” from the dropdown menu
- Use the timeline arrows to navigate to a backup before deletion
- Select your files and click “Restore”
Part 3. Using Data Recovery Software (For Permanently Deleted Files)
When quick fixes fail and files have been permanently deleted or Trash has been emptied, professional data recovery software becomes essential. Wondershare Recoverit for Mac offers powerful capabilities specifically designed for restore deleted files macbook scenarios.
Why Recoverit Excels at Mac File Recovery:
Advanced Scanning Technology:
- Deep scan algorithms – Penetrate storage structures to locate deleted file signatures
- AI-powered detection – Intelligent file recognition and reconstruction capabilities
- File system analysis – Works with APFS, HFS+, and other Mac file systems
Comprehensive File Support:
- Document recovery – Word, Excel, PDF, Pages, Numbers, Keynote files
- Media recovery – Photos, videos, audio files in all major formats
- System file recovery – Application data, preferences, and system files
How to Use Wondershare Recoverit for Mac:
Step 1: Install Recoverit Safely
Download and install Wondershare Recoverit on a different drive than where your files were deleted. This prevents overwriting recoverable data during installation.
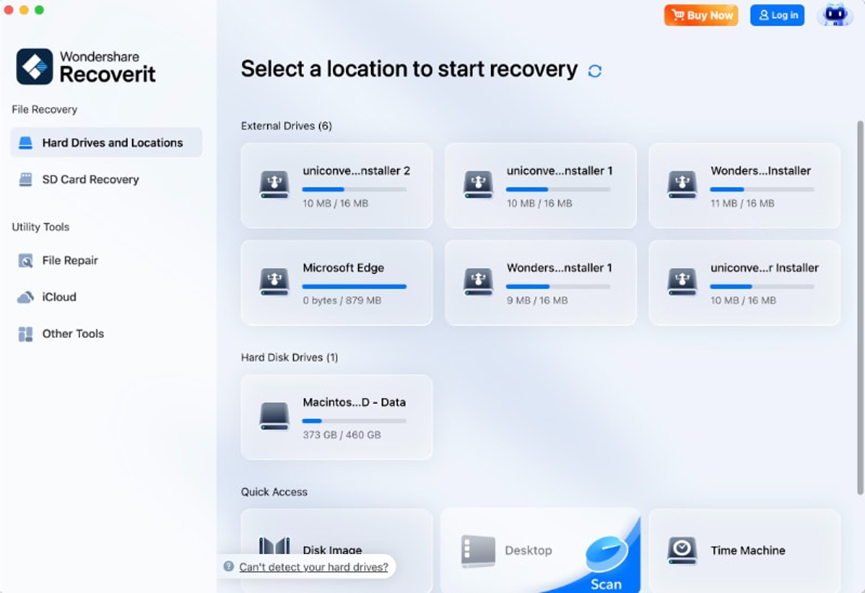
Step 2: Select Recovery Location
Launch Recoverit and choose the specific drive, partition, or folder where your files were deleted. For maximum recovery potential, select the entire drive rather than specific folders.
Step 3: Start Comprehensive Scan
Click “Start” to begin scanning. Recoverit performs both quick scan for recently deleted files and deep scan for comprehensive recovery of recover permanently deleted files mac scenarios.

Step 4: Preview and Verify Files
Use the preview function to examine recoverable files. This crucial step ensures file integrity and helps identify the correct files for recovery. Preview supports photos, videos, documents, and many other file types.

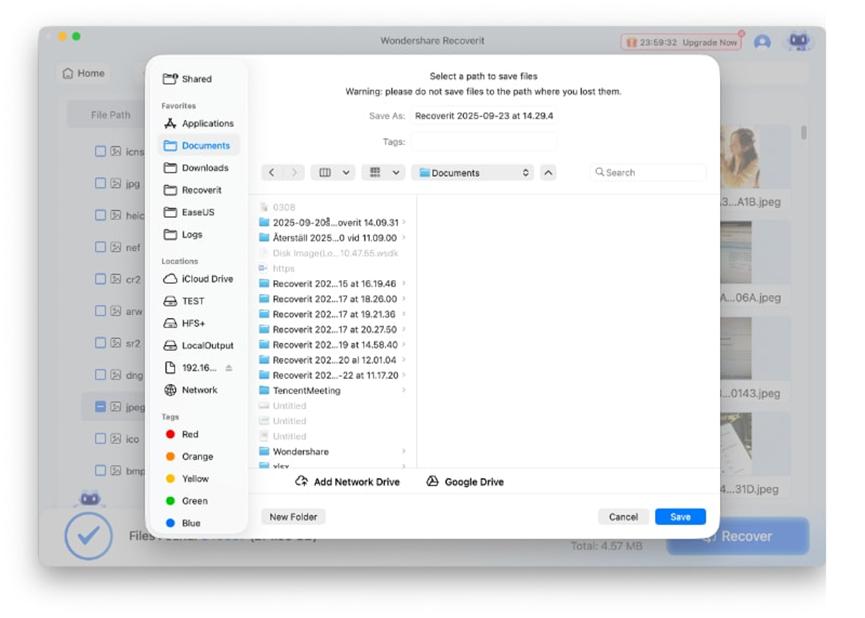
Step 5: Recover to Safe Location
Select the files you want to recover and choose a destination on a different, healthy drive. Never save recovered files back to the original location to prevent overwriting other recoverable data.
Part 4. Troubleshooting: What to Do If You Can’t Find Your Files
If initial recovery attempts don’t locate all missing files, try these advanced tips:
- Expand search scope – Scan entire drives rather than specific folders
- Use file type filters – Filter results by documents, images, videos, or audio
- Search by file extensions – Look for specific formats like .docx, .jpg, .mp4
- Check different scan modes – Combine quick scan and deep scan results
- Verify recovery destination – Ensure you’re saving to a different, healthy drive
- Allow complete scanning – Let deep scans finish completely for maximum results
Part 5. Proactive Protection: How to Avoid This in the Future
Taking preventive measures protects against future data loss:
- Enable Time Machine backups – Set up automatic hourly backups to external drives
- Use cloud synchronization – Use iCloud, Dropbox, or Google Drive for real-time sync
- Double-check before deleting – Review Trash contents before emptying permanently
- Practice safe ejection – Always eject external drives properly before disconnection
- Regular backup verification – Test backup systems periodically to ensure functionality
- Maintain adequate free space – Keep sufficient storage space to prevent system issues
Conclusion
Recovering deleted files on Mac, even after emptying Trash, is often achievable through systematic approaches ranging from built-in recovery features to professional software solutions. While Time Machine and app-specific recovery options provide first-line protection, specialized tools like Wondershare Recoverit offer powerful capabilities for permanently deleted file recovery. The key to successful recovery lies in immediate action, proper technique selection, and implementation of robust backup strategies to prevent future data loss incidents.
